Below are some pictures of the rod-holder outrigger combo that I just built for my kayak. The kayak is an inexpensive 10 foot SunDolphin Journey. For about $300 you can buy one of these awesome kayaks. I fished the kayak unmodified for about a month but realized it would benefit from standing capabilities. Without outriggers there would be no-way to maintain stability on a kayak of this size. My initial plan was to make a one-sided outrigger, which I ended up doing last weekend. Let’s just say there is a lot of R & D that still needs to go into the single-sided outrigger (I will post pics of the design soon). This new design was much more thought out and conceptualized. I can’t remember where, probably a Youtube video or something, but I saw a similar design somewhere that inspired me to build this 2-in-1 kayak rod holder/outrigger. I used PVC piping for the main frame of the apparatus. PVC pipe is really fun to work with and it really gives you a mix of strength and weight-savings that you will not find with wood or metal. Using PVC also makes the outrigger very modular with the ability to add on to the design at a later date if I choose to do so. With that in mind, I chose not to cement each piece together but instead drill holes that would be filled with stainless steel screws that can be removed and adjusted at any point.

The bill of materials… Spent a total of $16.46. Purchased all of the items online through the Lowe’s pickup program. Ignore the drawing above. That is a design for a outboard motor holder that I will be working on soon.

The original design idea!
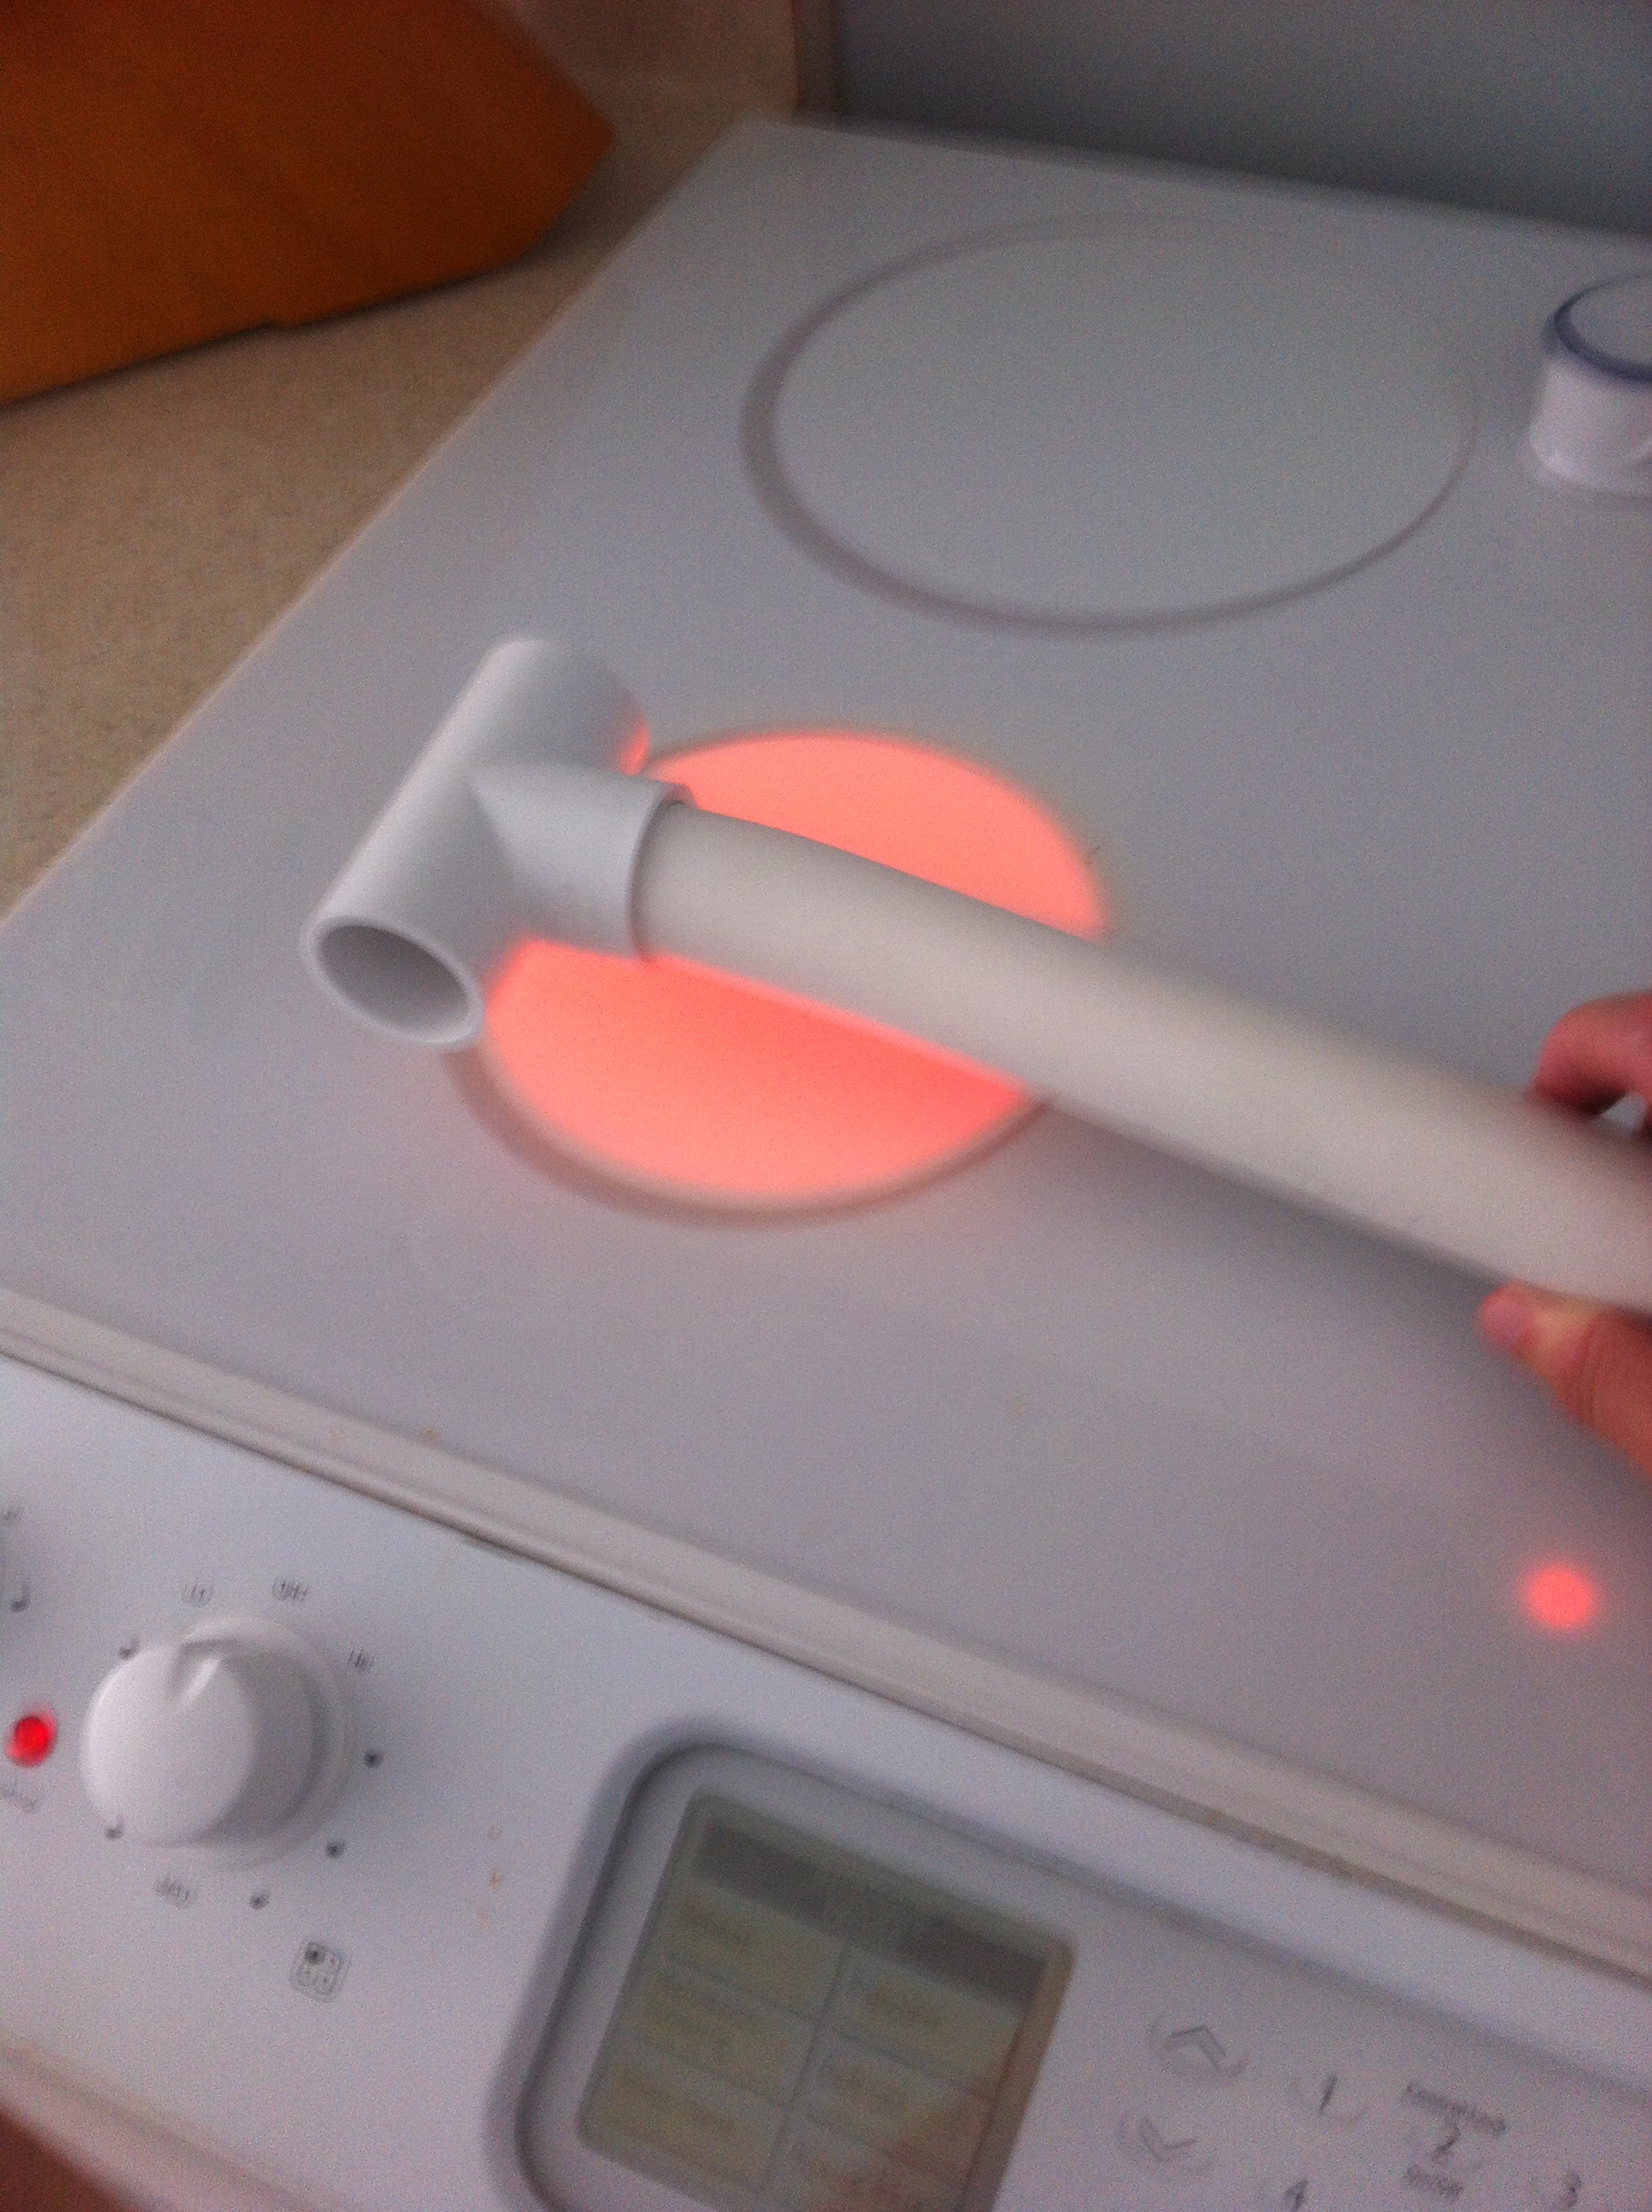
Heating the pipe. I realized that 90 degree angles were not going to work with the angles of the mounts on the kayak, so this is all I could think of. I don’t own a heat gun, otherwise I would have used one. I think the fumes given off by heated PVC are bad for you.

Oops! A little too much heat on that one.

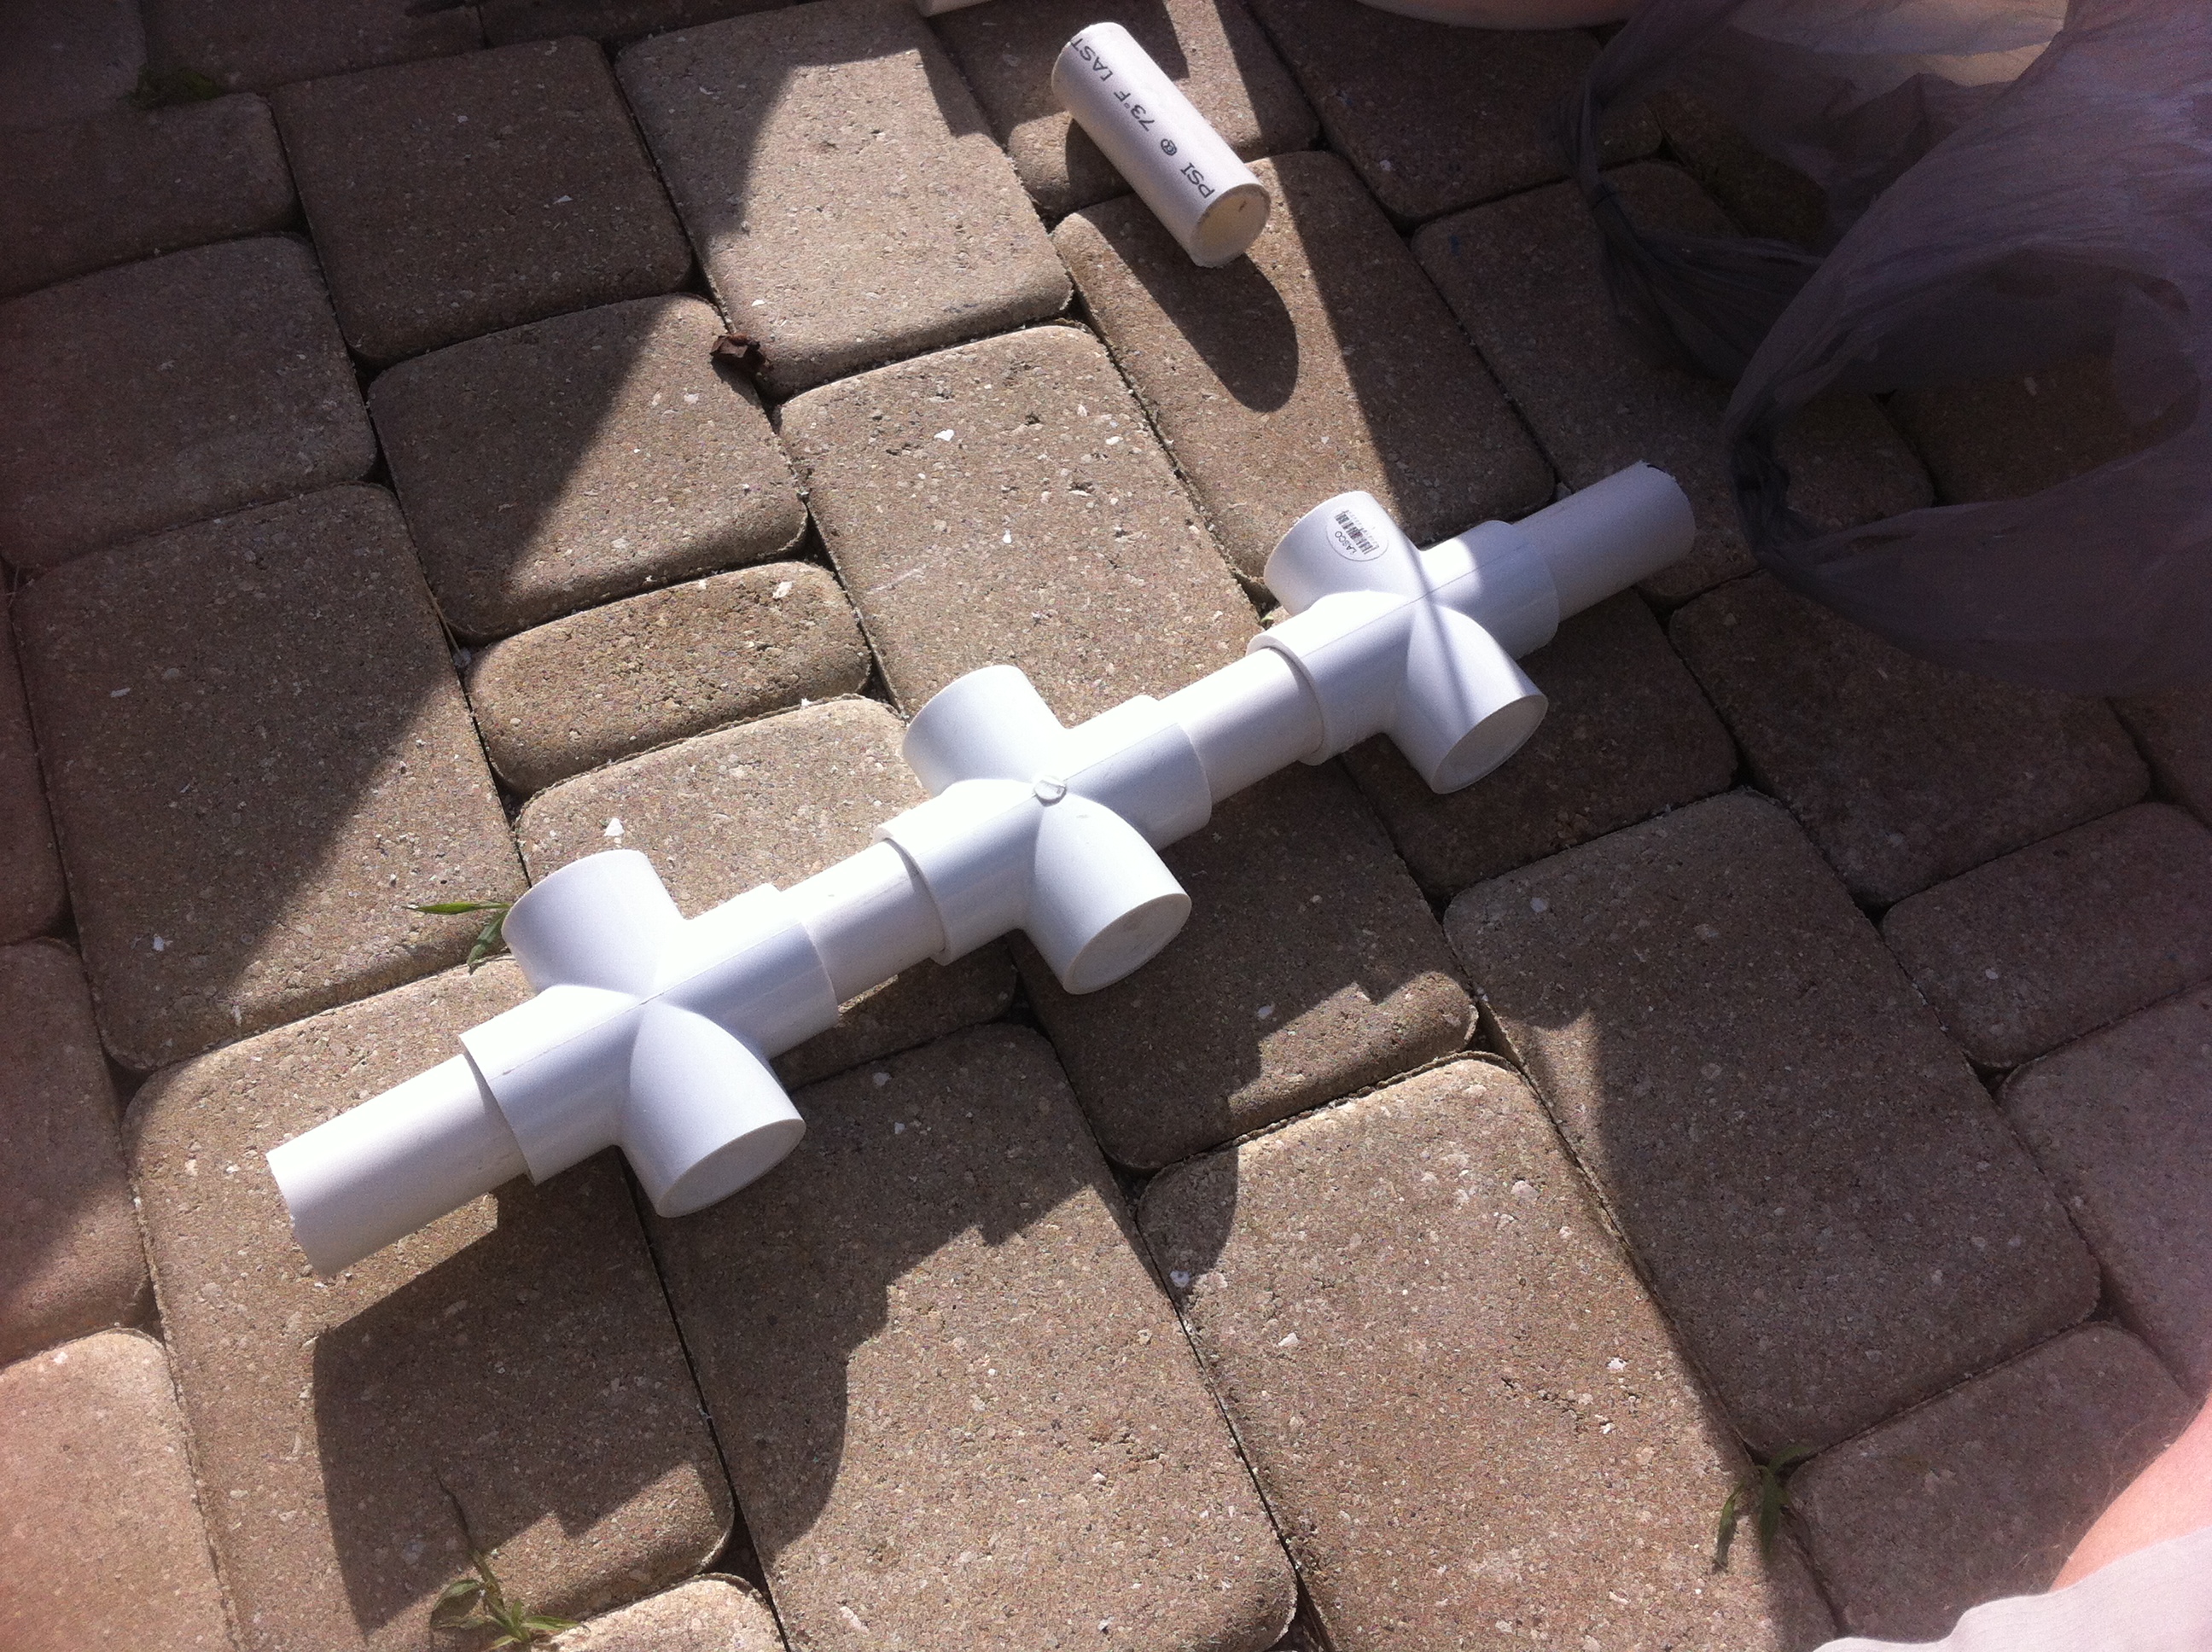
All of the angled components… 2 elbows, 3 crosses, 2 t’s

This is how the pipes looked after the heating process. I bent them to about 135 degrees. They were probably heated to about 250 before they started getting mushy.
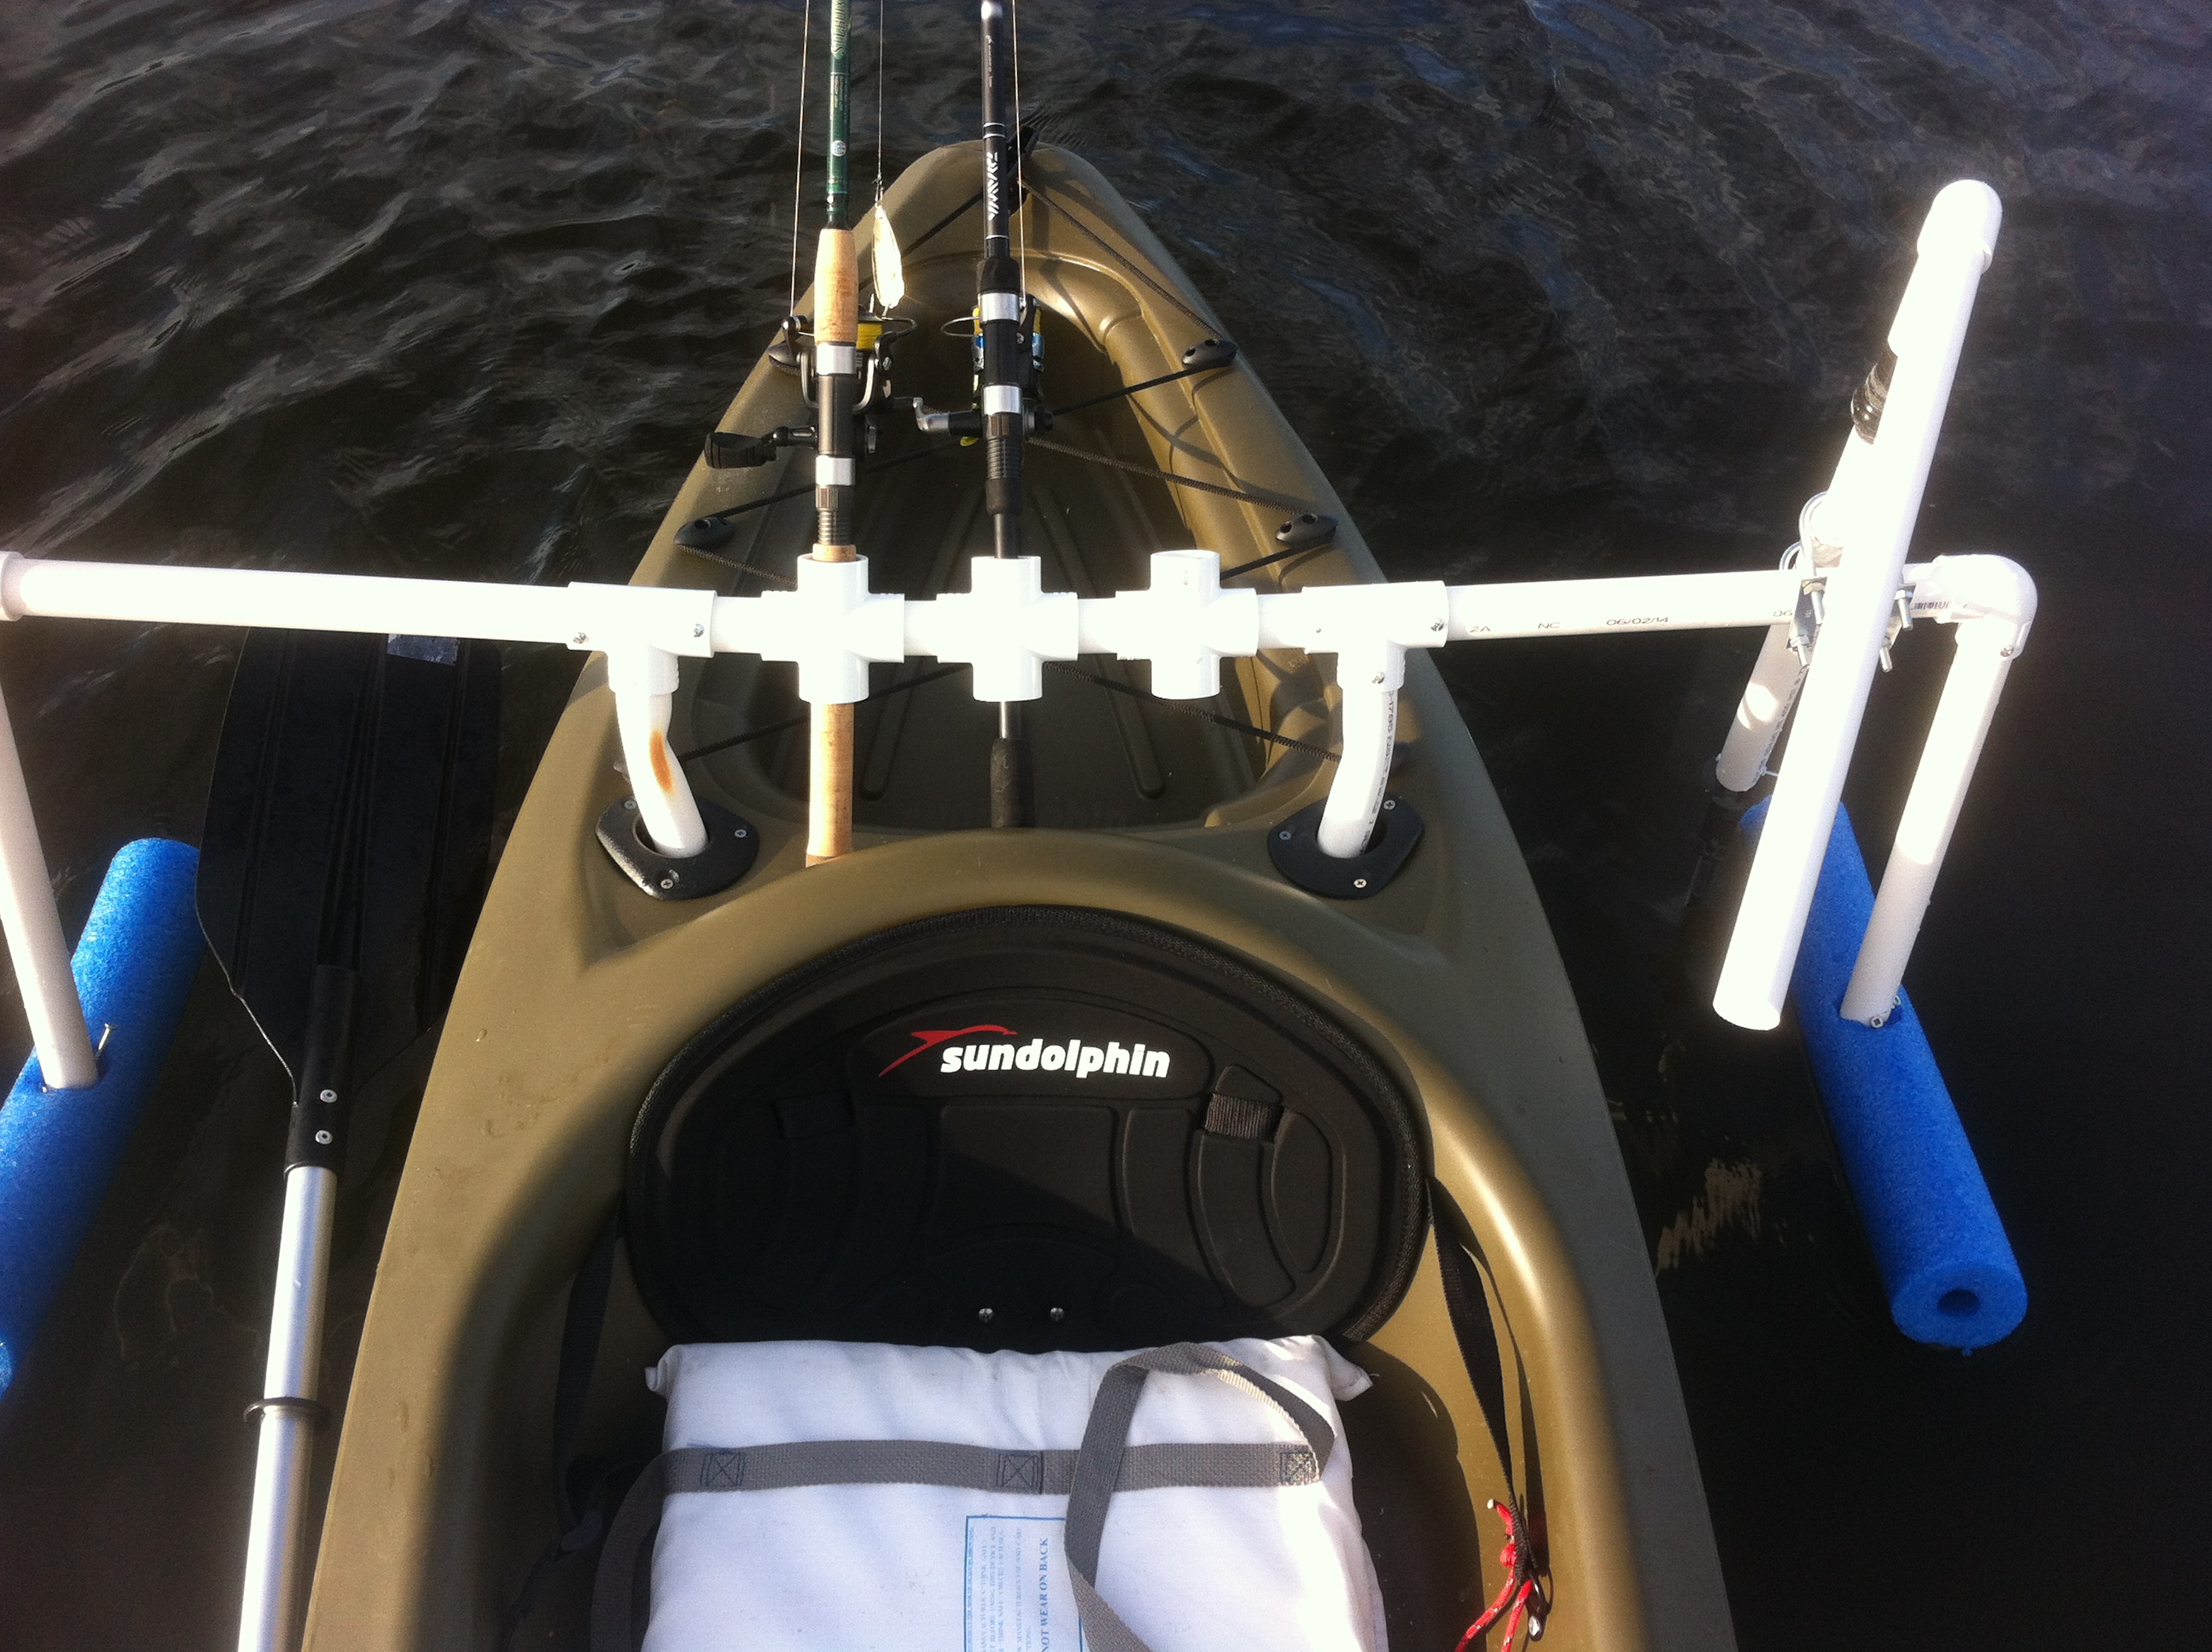
The semi-finished project. I will be testing and tweaking tomorrow.

This is how I attached each piece. This is a good alternative to rubber cement because it allows the pieces to be taken apart and adjusted.

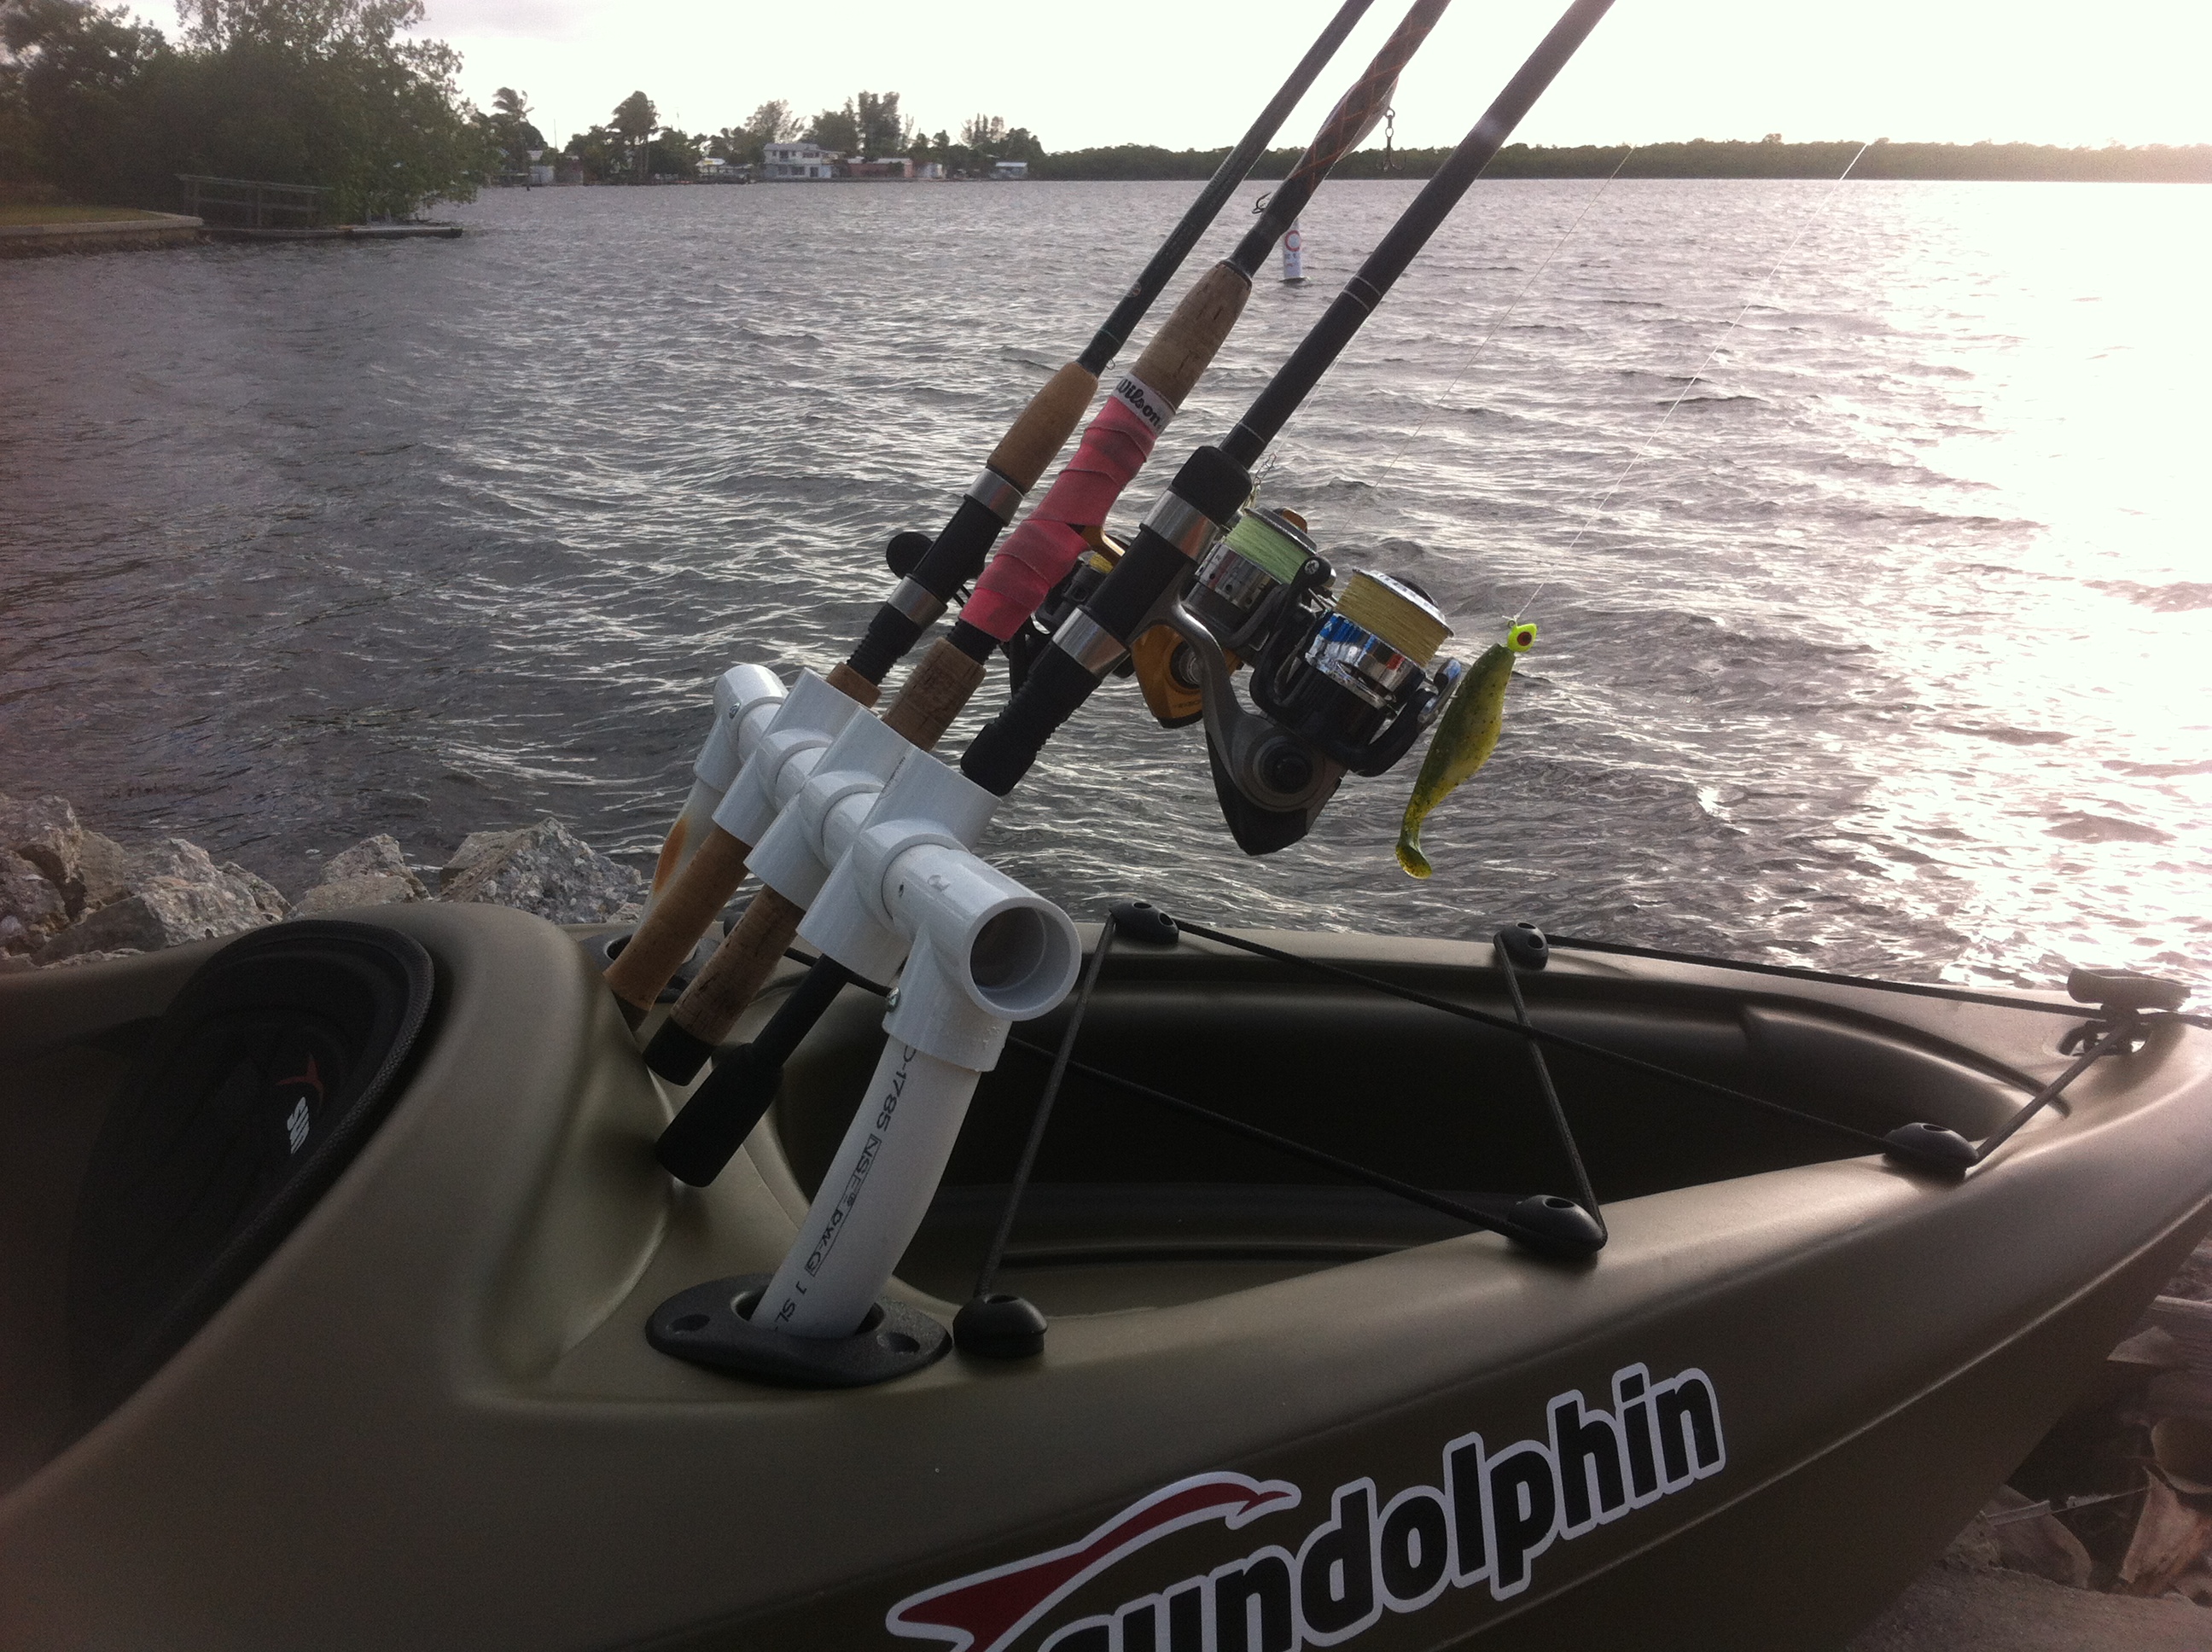
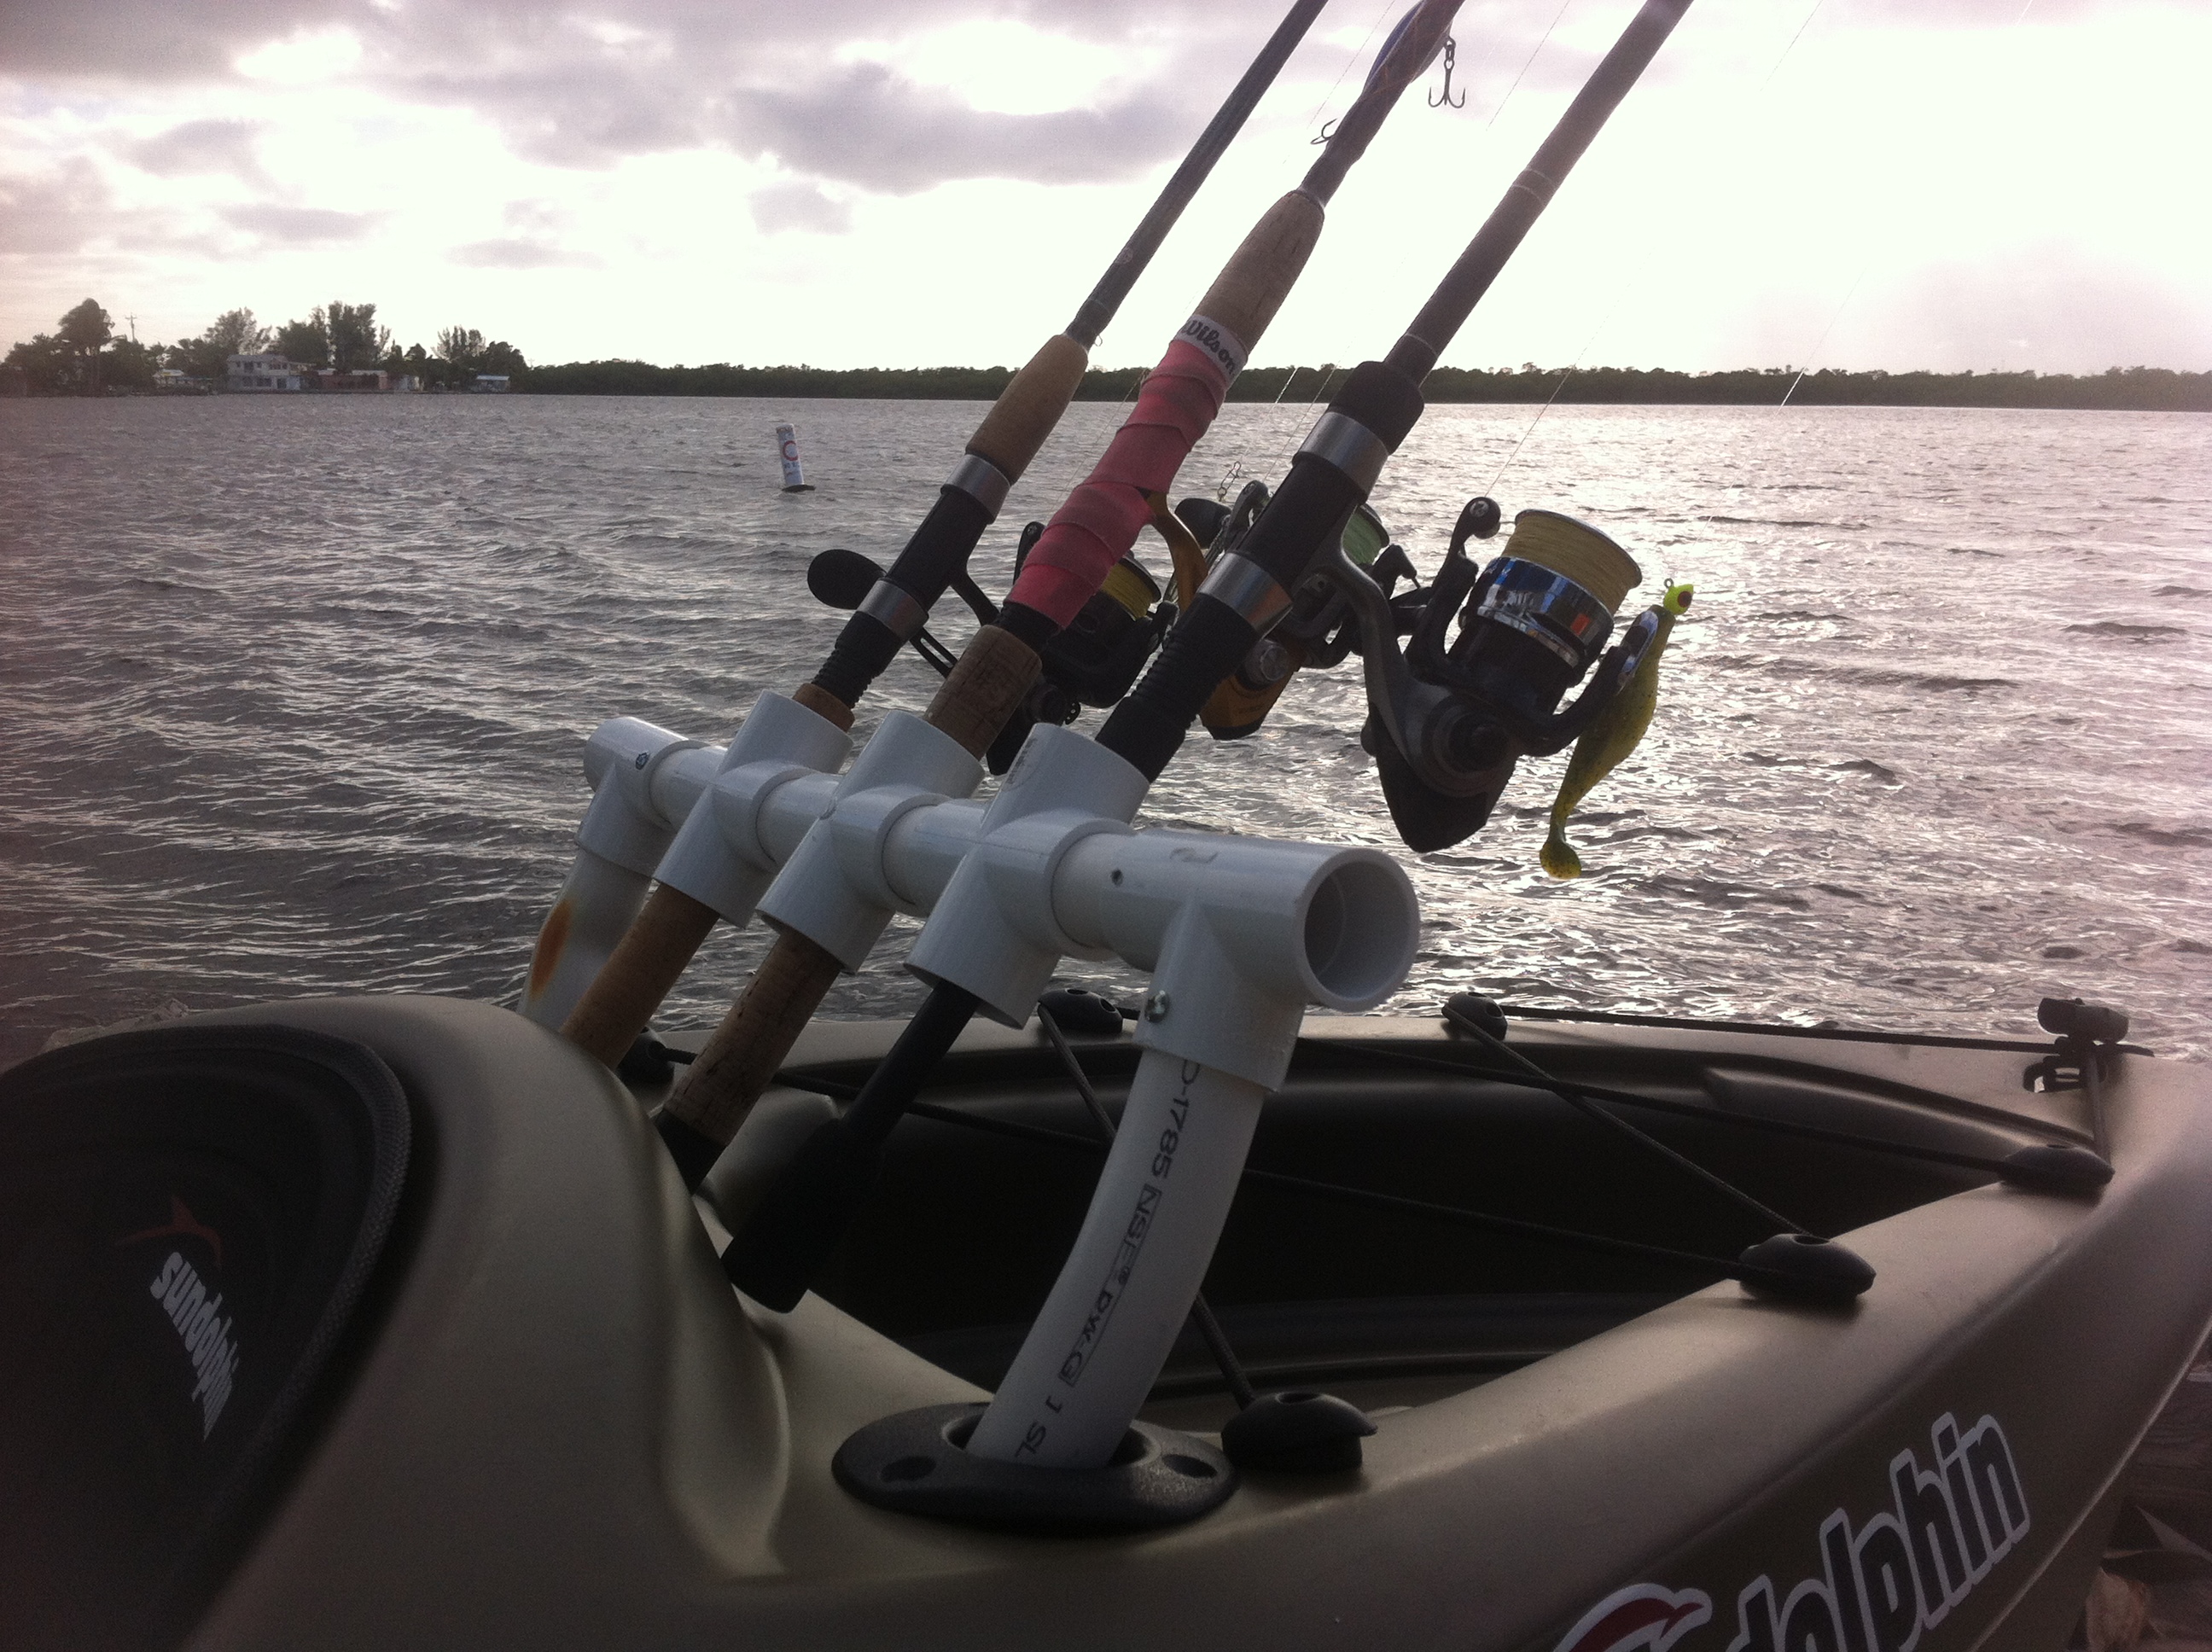
The two base pieces fit snuggly in the rod holders that came with kayak from the factory. I used 1″ pvc for the whole build.

The rods fit nicely in the 1″ cross-sections. Now I have 4 rod holders in this thing! Not that I need that many. I only ever take 2 rods with me. From left to right… St. Croix Legend with a Penn Conquer reel, Penn inshore rod with Quantum Triax reel, and A $20 Dyawa combo from sports authority. Surprisingly, the cheapest rod gets the most use and I have landed more fish on it than all the other ones combined.
The semi-finished Product. Testing and tweaking will take place tomorrow. It was already getting dark by the time I finished the build. Took about 3 hours total.

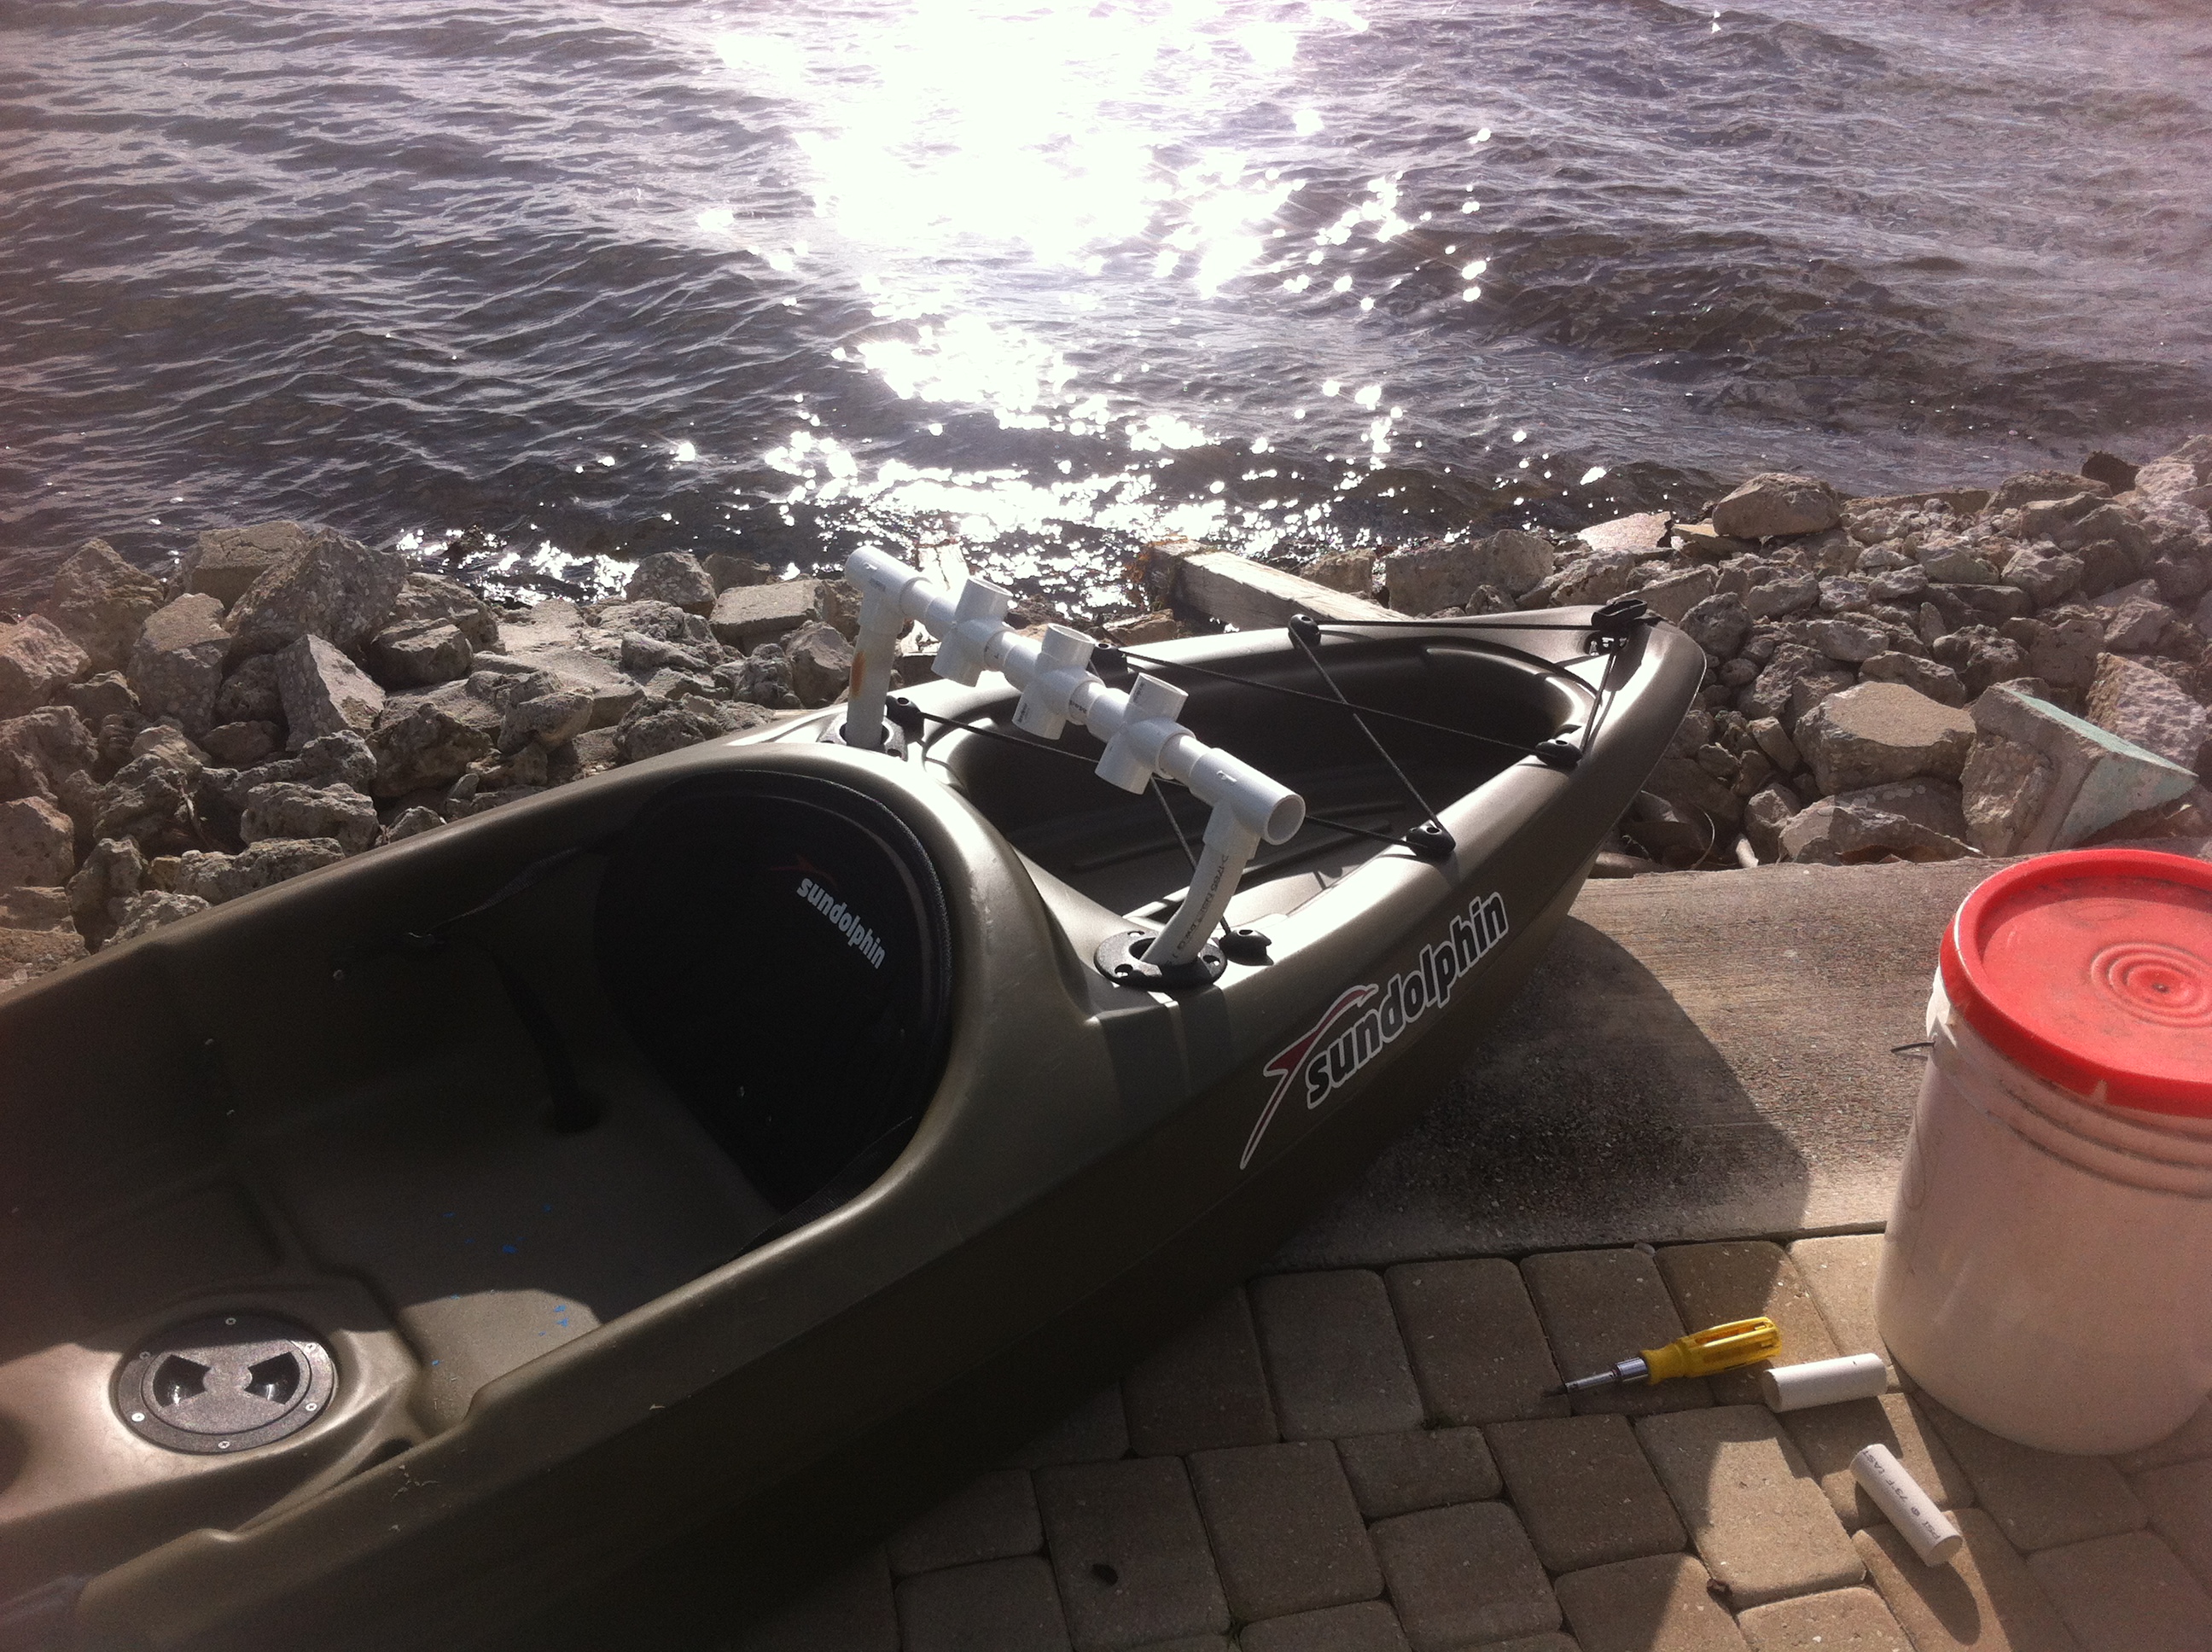
The kayak waiting on the ramp

The anchor made out of a down rigger weight

The rudder prior to attaching to the outrigger
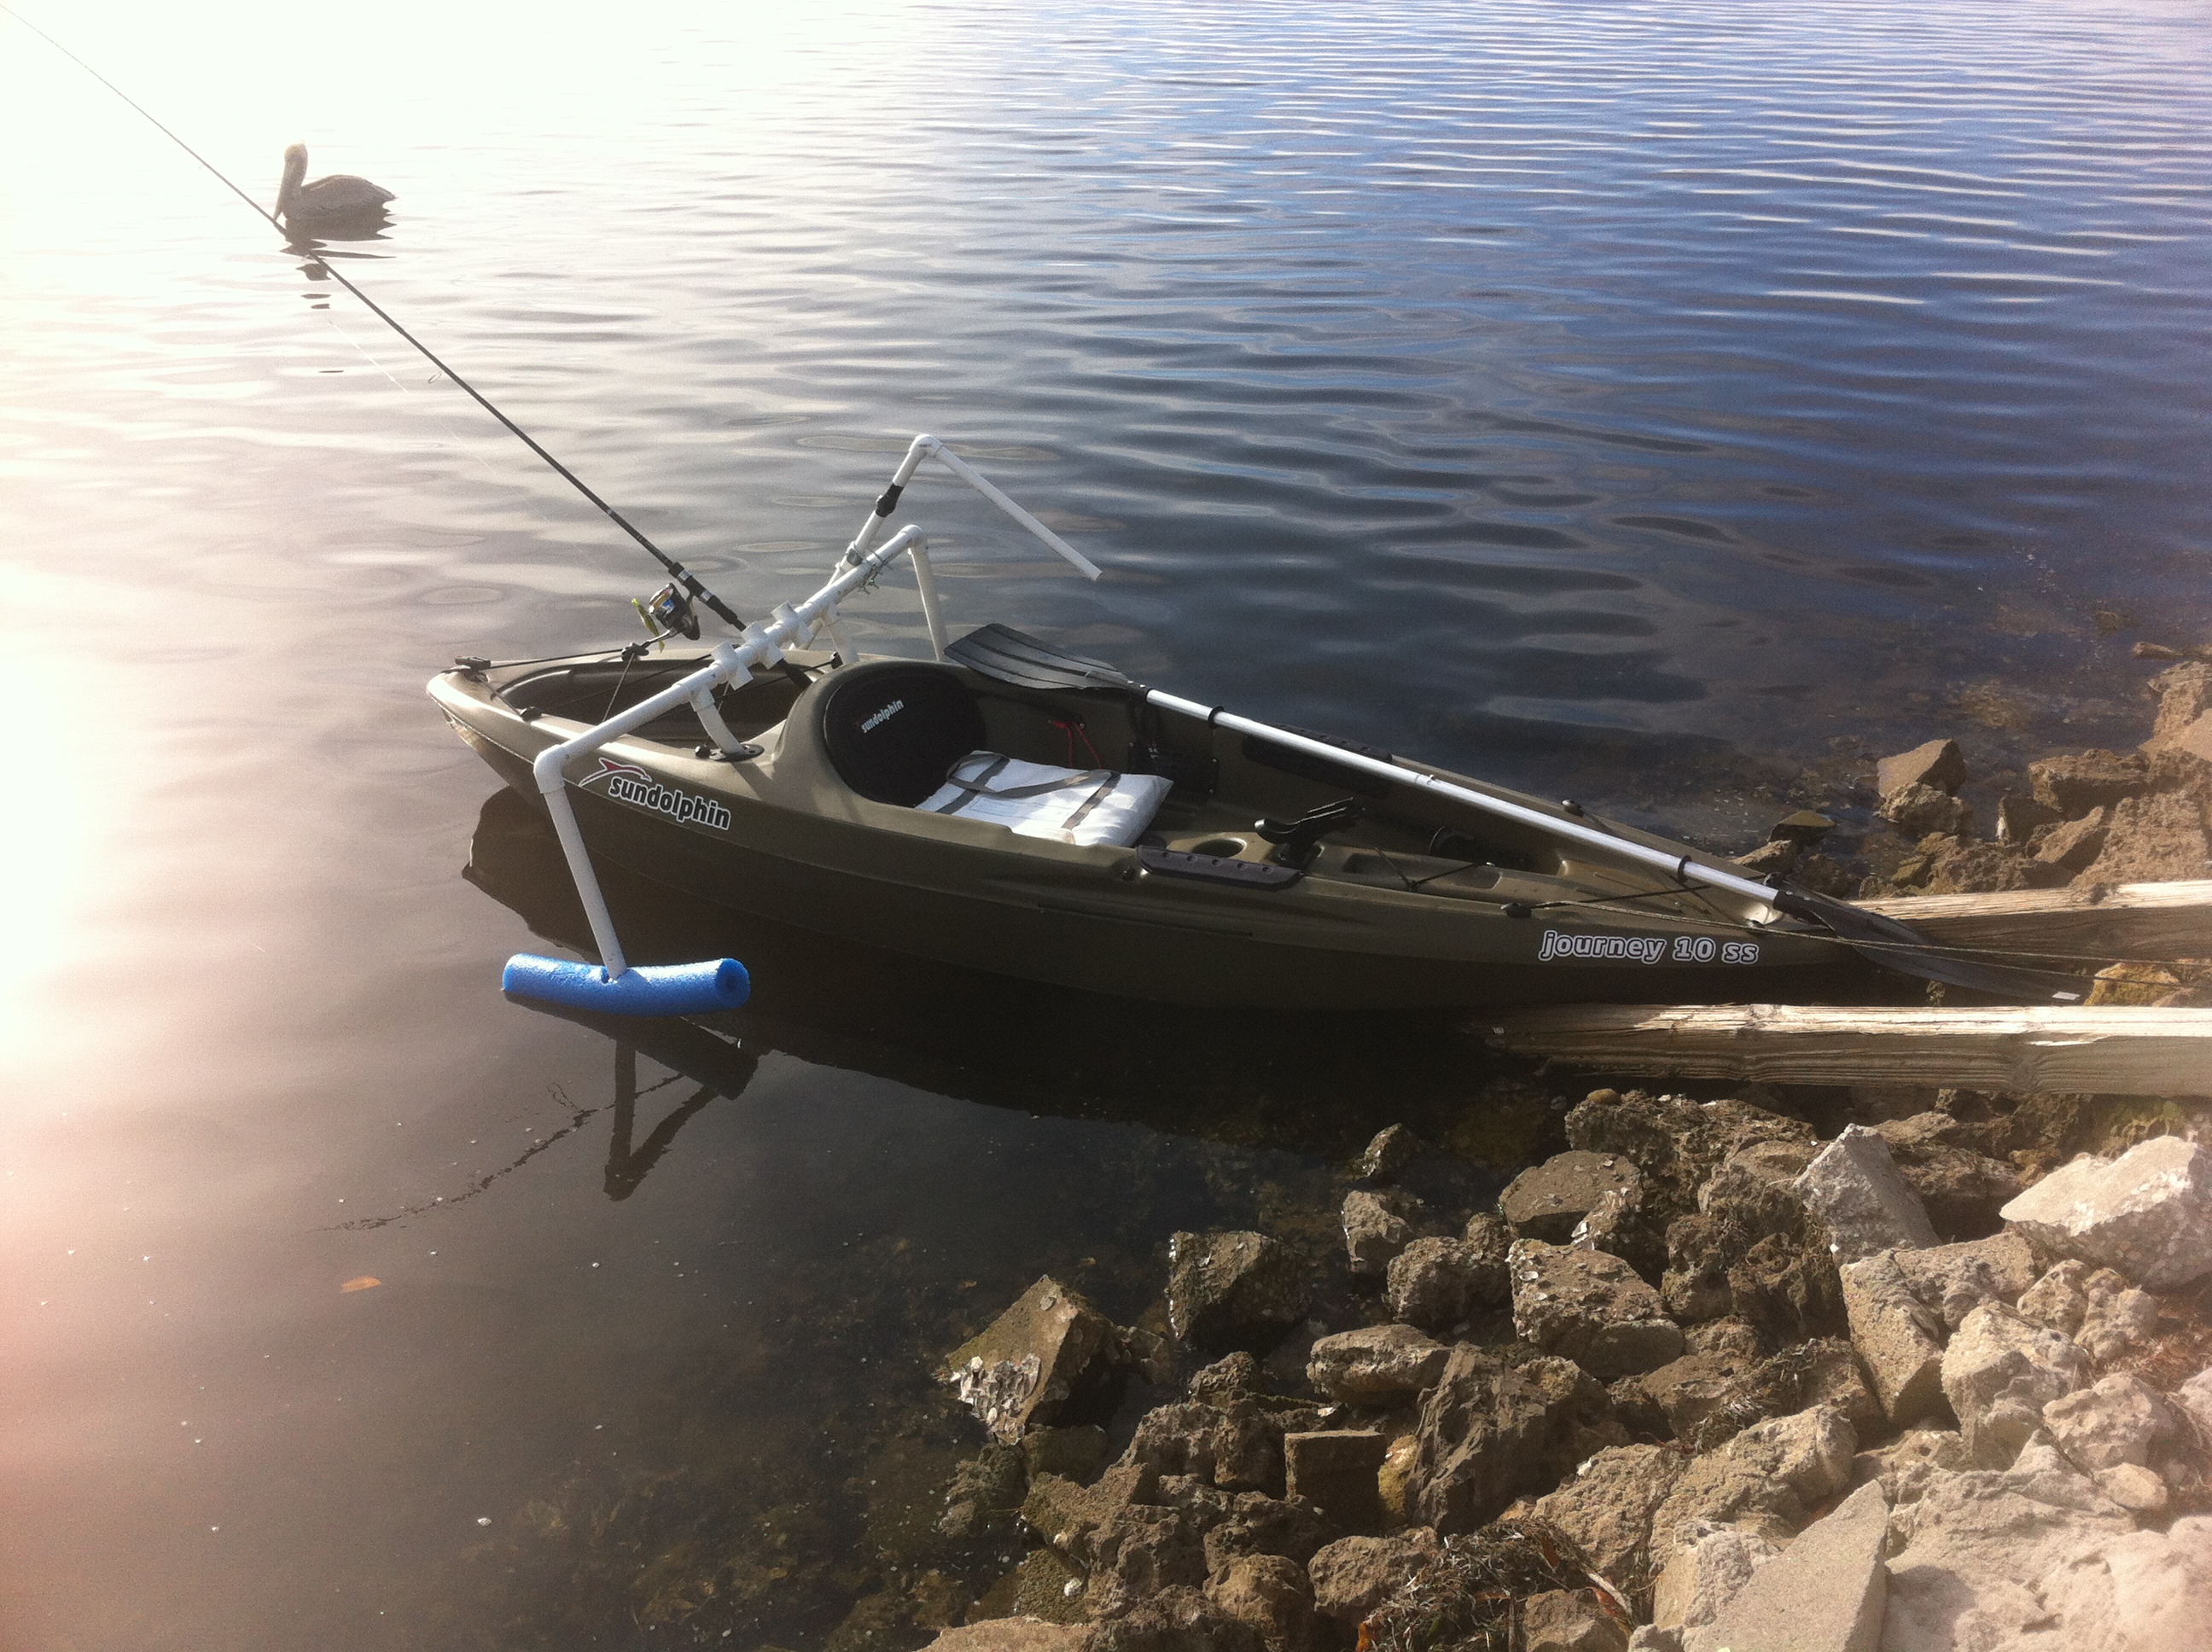
A standing shot from the water. I was on the very bow of the boat and it was still stable enough for me to stand. I’d say it works pretty well and it doesn’t get in the way like i thought it might. I can make a full paddle stroke without hitting the outrigger floats.


First of all, this is awesome! I have the tan version of this same kayak and I plan on doing a very similar build. Thanks for sharing! Secondly, how tight is it in the rod holders? Does it need something extra to fasten into them?
LikeLike
Thanks for the comment! I apologize for taking so long to respond. As far as the outrigger is concerned, when I bent the pvc pieces, I bent them enough so they sit pretty snuggly in the rod holders. They are tight enough that they don’t even need fastened down. Depending on how much of a bend you put in them that will kind of dictate how tight they are.
LikeLike
Did you do this upgrade because you fished offshore? I live in miami on the intercoastal and I’m not sure if I want to try taking my journey offshore.. Any thoughts?
LikeLike
Mike have you taken your journey out on the intercoastal? If so, how’d it do?
LikeLike
Where I live I don’t really have access to offshore fishing. I don’t think I would feel comfortable taking this kayak very far off shore even with the stability modifications. I did the modifications so I could stand and fish inshore with a small chop at max. I think this kayak has too many entry points for water to get inside the hull and that is why I would not feel comfortable going offshore.
LikeLike
Thanks, that is a good design. I’d like to buy this yak and do some modification, too.
I saw on youtube that other guy using electrical conduit instead of schedule 40 PVC, I may have to go the store to see how much more rigid the conduit is. Also, for the pontoons, they used crab floats, shape in nose reduce drag and bigger for more floatation. About the rudder, I may put at center point and using my back for control, or something similar. About water sipping inside the hull, maybe outdoor caulk would help to reduce them.
LikeLike
Thanks for the insight. I don’t have any experience with electrical conduit but if it is more rigid it would certainly work as well. The pontoon idea using the crab floats is good as well because the flotation pieces that I used do tend to catch the water when paddling. End caps would definitely reduce the drag. Something I normally do when using this device is lift the sponsons up and out of the water when I’m paddling and push them back down into place only when im standing.
LikeLike
I have this yak, and my butt always gets wet from the scupper holes in the seat. Universal plugs didn’t work well, so I used silicone caulk to fix.
I put a piece of painters tape in the hole about a half inch above the exit point. I then flipped the yak over and filled with silicone, bringing some over the top (bottom, actually). It settled nicely and gave a smooth surface.
I haven’t removed them, but if needed, I think a can cut the bottom part off and the plug in side will come out easily enough.
So far, so good.
LikeLike
That’s a pretty good idea and sounds excellent for use in cold weather!
LikeLike
rather than heating up PVC & bending you may try a 45 degree elbow, available at big box retailers.
LikeLike
Yes you can definitely do that as well. I chose to bend the pieces by hand because I didn’t know the exact angle that I would need
LikeLike
Hello
I was wondering if you think the journey 12″ would be good for going off the beach into the gulf
LikeLike
I’m sure you could on a calm day. I’ve never tried taking my 10 footer off the beach but I wouldn’t be concerned doing so. It seems to handle waves just fine and it’s self bailing so if any water came in it would drain right out. One thing I would recommend is siliconing all of the entry points where things have been riveted or screwed onto the kayak. Those place may allow a little bit of water into the hull. Thank you for your comment.
LikeLike
My wife called me the other day…”Guess what? I bought 2 kayaks on sale and put them plug them on hold, Merry Christmas!” We went to pick them up that evening. 2 Sundolphin Arubas. I wanted to sit on top so I could fish better, so we had the store call around and find me one. I’ll be picking up my Bali 10ss soon. Now I’m up every night checking out what others have done. Lots of good ideas out there. I’ve noticed use of white and grey pvc pipe. The color is mearly a dye. If you’re digging you may wonder what you’ve just hit with your shovel. White is plumbing, grey is electric, purple is reclame water, yellow is gas. As for the pvc your schedule 40 is all the same, nothing is different but the color! I’ll take what I can find an paint it to match my scheme. I can hardly wait to start! And most likely never finish. BTW I emailed SunDolphin- the only difference between a Bali and a Journey is the Journey is set up for fishing
LikeLike
That’s great! I received mine for Christmas last year and I have thoroughly enjoyed it. I’m sure you will have no problem turning the Bali into a nice fishing kayak. Thanks for your comment!
LikeLike
The different color reflect the different PSI.
LikeLike
I will say one thing between Electrical PVC (grey) and plumbing PVC (white) Electrical pvc does not hold pressure very well and will shatter under pressure it is UL listed for electrical uses not plumbing, the white pvc will hold air pressure up to like 200 psi and when it ruptures it a split or a crack, the gray pvc is stiffer, being a electrician for over 35 years you can’t keep water out of the grey, There is a difference, be aware
LikeLike
Great design! I’m planning on building a couple for my 10′ and 12′ sundolphins. Where did you purchase the rudder?
LikeLike
Thank you. The rudder is from a lifetime paddleboard. I believe you can purchase them on the lifetime Website.
LikeLike
This is great. I just built one using this blog for my 10′. Where did you purchase the rudder?
LikeLike
Thanks I appreciate it. Glad it helped. I had the rudder leftover from an old lifetime paddleboard that I had.
LikeLike
Hi, I just read your inspiring blog on this rod holder that you built. It seems like a simply and easy idea to make. I just purchased the same Kayak a few days ago. I love to fish too but I’m new at this Kayaking stuff you have given me a good idea and a great starting point. Thanks again I do appreciate.
LikeLike
Glad you found it helpful! Tight lines!
LikeLike
very insightful read. have you changed to a different source for the outriggers. (replaced the noodles.)
just curious of how they hold up or should i look for a different material to use?
LikeLike
The outriggers have held up fine. The flotation material will break down overtime from the saltwater and uv rays of the Sun but they can be easily replaced if you notice that they aren’t as buoyant as they should be. I’ve seen a few people use sealed 2 liter soda bottles as flotation which would certainly do the trick.
LikeLike
How much total feet of PVC was used looking at making this
LikeLike
I really like the design and idea. I found a cheap set of dock bumpers I’m going to try to use and see how that works. How far down do the outriggers go on yours in relation to the bottom of the kayak or distance from the ground to the bottom of the floats when on dry land? I’m trying to get an idea of how much contact they should have with the water at all times when down.
LikeLike
Just finished building mine. The 45 degree elbows worked great so I didn’t have to heat the pvc pipe and risk burning down the house. I put the noodles on but have ordered 4 11 inch crab floats that I’ll install instead. I think it will look pretty slick after I paint it all black. Thanks for the great idea.
LikeLike
great idea design, if you dont mind, how much was the whole project. Also do you have dimensions for the pipes and things. Does this work well, and is it easy to take out ? Also how is it staying in the rod holder holes without coming out ? Thank you
LikeLike
I am about to put outriggers on my Journey 10 as well, thank you for this article. I measure the rod holders at about 1 5/8″ so I’m going to see if I might be able to use 1 1/4″ schedule 40 electrical conduit, as the walls seem thicker and more rigid and O.D. seems to be about 1 5/8. Perhaps the rod holders taper down inside? If it doesn’t work I’ll just use 1″ as in this article.
I’m also a little concerned about flex with each outrigger having that 90 degree bend, so I’m going to see about using 45 degree pieces to have it just slope down to the waterline. When the tide goes out here it can get a little choppy. Bullet crab pot floats with capped ends and all the pieces painted to match should look pretty nice. I have a pair of quick release pins for the outrigger attachment so as not to have to mess with screws to take them off.
At any rate, thanks once again for this article and I’m glad they seem to be working well.
LikeLike